The HealthSmart Add-on integration with Google Classroom provides a simpler way for students and teachers to access HealthSmart content from within the LMS.
In this article you can find step-by-step instructions on the following topics:
- Getting Started
- Signing In
- Starting HealthSmart
- Lesson Navigation
- Creating an Assignment
- Teacher Resources
- Student Resources
- Re-Use Post
- Grading
-
Teacher View of Student Drafts
What You Need To Get Started
- A school/district digital subscription to HealthSmart.
- School/district IT has completed the integration setup.
Sign-In with Google
-
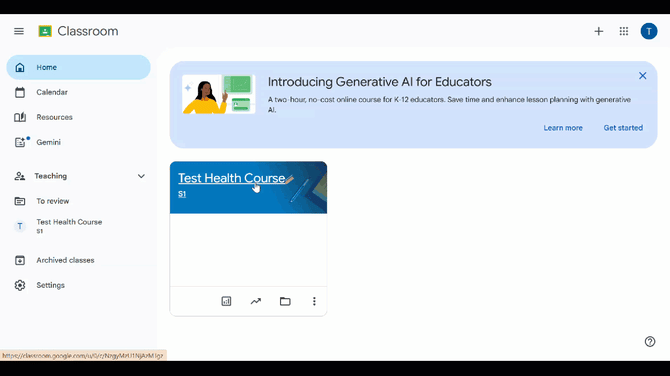
Open Google Classroom. You will land on the "Home" screen.
- Your link will look similar to this: https://classroom.google.com/
-
️ Locate the "Teaching" Section. On the left-hand sidebar, find and click on the "Teaching" header to expand it and see your active classes.
-
Select Your Class. From the list under "Teaching," click on the specific class you want to enter, in this case, "Test Health Course s1".
-
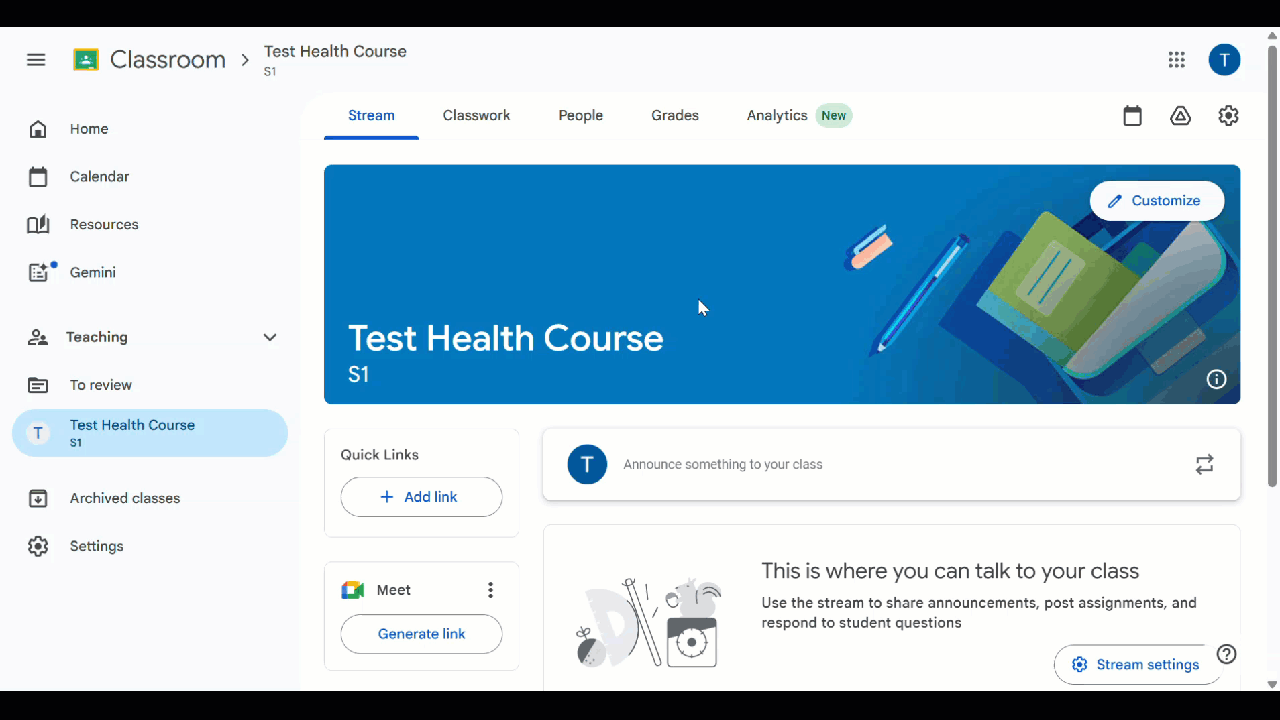
View the Class Stream. You will now be taken directly to the main "Stream" tab for that class, where announcements, assignments, and recent posts are displayed.
Starting HealthSmart
Integrating engaging health education content into your curriculum is remarkably straightforward with the HealthSmart add-on for Google Classroom. The tool is designed to work seamlessly within the platform you already use, allowing you to find, customize, and assign lessons to your students in just a few clicks, directly from the assignment creation screen.
-
Navigate to Your Class:
-
Enter the specific class where you want to create the assignment (e.g., "Test Health Course").
-
-
Open the Assignment Creator:
-
Click on the "Create" button in the top-left area of your class page.
-
From the dropdown menu that appears, select "Assignment".
-
-
Open the Add-on Menu:
-
In the assignment creation window, look for the puzzle piece icon (🪆) labeled "Add-ons" on the far-right side of the toolbar beneath the assignment title field.
-
Click on the "Add-ons" icon.
-
-
Select HealthSmart:
-
A menu will pop up showing the Add-ons available to you.
-
Click on "HealthSmart" from this list to open its sidebar.
Lesson Navigation
-
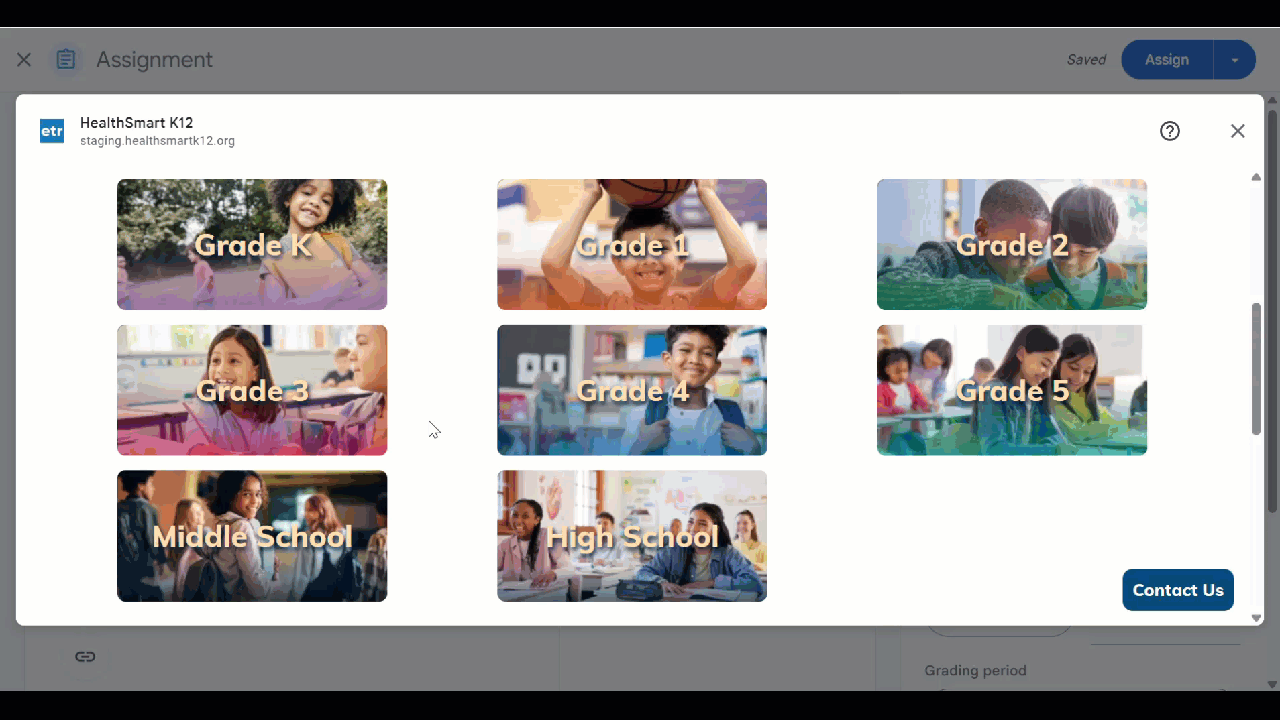
Step 1: Select a Grade Level
On the homepage, you’ll see a list of available grade levels (e.g., Grade 1, Grade 2, etc.).
Simply click on the grade you want to explore.
Step 2: Choose a Lesson Module
After selecting a grade, you’ll see the different lesson modules available for that grade (for example: Grade 3, Grade 4, etc.).
Click on the module title to open it.
Step 3: Explore the Lessons
Once inside the module, you’ll find a list of individual lessons. Click on any lesson name to:
-
View lesson content
-
Access teaching resources
-
Download materials
Step 4: Navigate with Ease
Use the back arrow or the links near the top of the page to easily return to previous sections or choose a new grade.
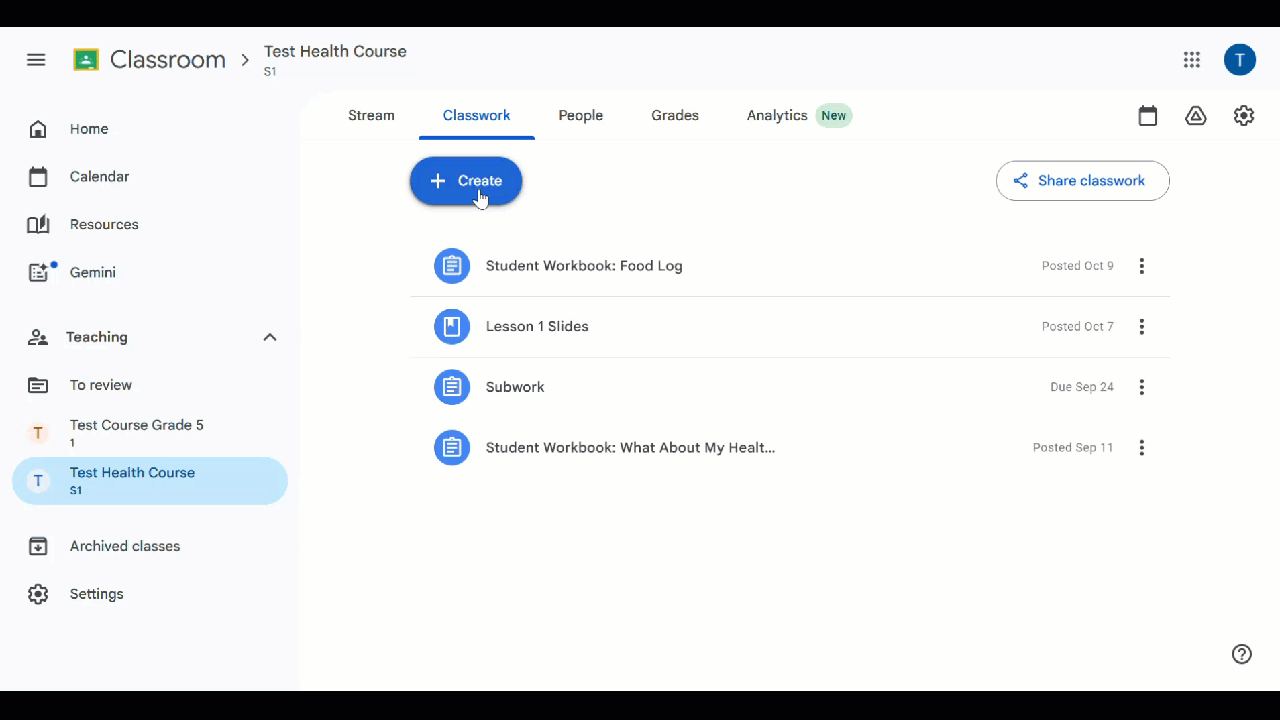
Creating an Assignment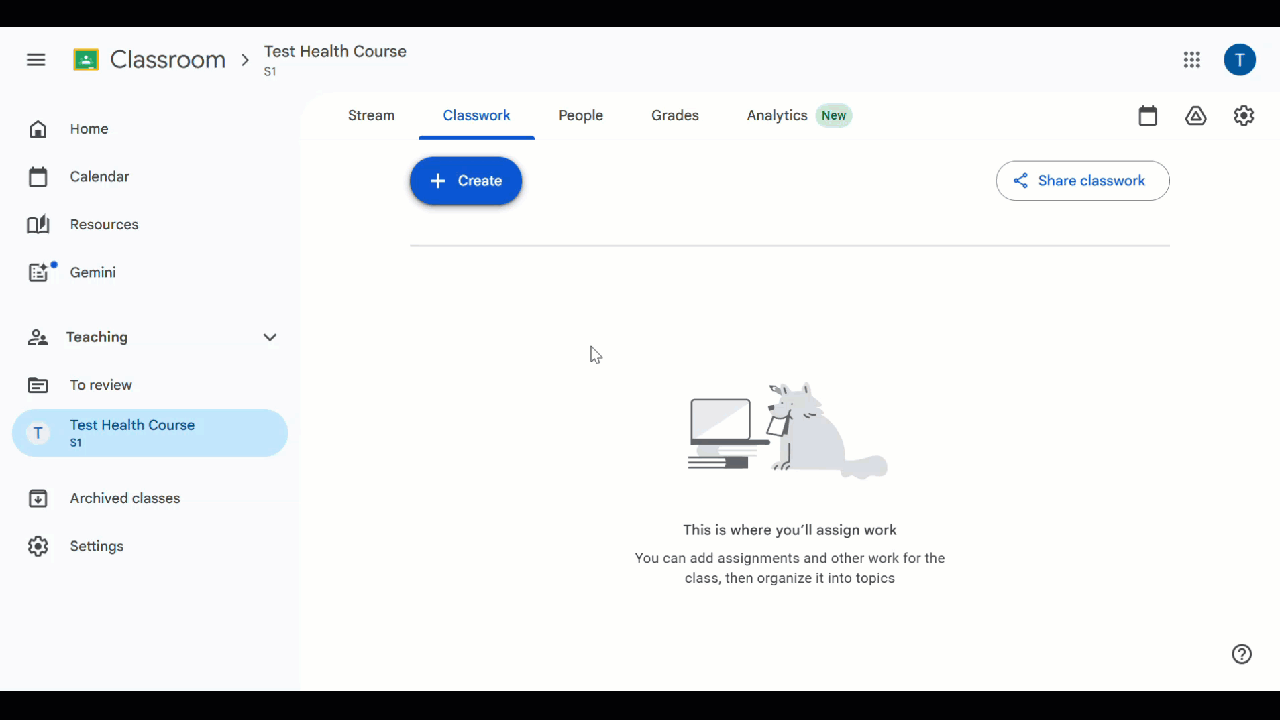
-
In your Google Classroom, navigate to the "Classwork" tab.
-
Click the "+ Create" button to the left on the screen, then the "Assignments" button from the dropdown.
- Once the "Assignment" window pops-up, click the "HealthSmart" app underneath the "Add-ons" section.
- The HealthSmart add-on window will pop-up. Click the blue "View Lesson" button.
- Select your Grade from the "Grade Level" page.
- Then select the lesson you'd like to teach in the "Lesson List" tab.
- Once you have selected the lesson, click the "Student Resources" tab where you will see all student facing materials.
- You can choose to create 1 assignments using English, Spanish, or Both languages, or you can create multiple assignments for students.
- After creating the assignments, click the "X" in the upper righthand corner of the pop-up window, which will take you back to the "Assignment" page. This is where you'll see your assignment(s) you've created in the HealthSmart window.
- In the upper-righthand corner, click the "Assign" button. That's it! You'll see the assignment(s) on the Classwork page.
Teacher Resources

Want to make those HealthSmart PDF slides available to your students right in Google Classroom? It's super easy! Just follow these steps:
Part 1: Download the PDF from HealthSmart
-
Find Your Lesson: First, navigate to the lesson you're teaching in your HealthSmart account. You'll see a list of resources for that lesson.
-
Locate the PDF: Look for the resource titled "Lesson 1 PDF Slides" (or whichever lesson number you're on).
-
Download It: Click the button that says "View English" or "View Spanish". This will open the PDF in a new browser tab.
-
Save to Your Computer: In the new tab, look for a download icon (usually a downward arrow) or right-click on the PDF and select "Save As...". Save the file to a place you'll remember, like your Desktop or a "HealthSmart" folder.
📌All Teacher and Student Resources are located within the HealthSmart Add-on, providing a centralized place to navigate and manage all your lesson materials!
Part 2: Upload the PDF as Student Material
Now, let's put that PDF where your students can find it!
-
Create a New Material: Look for an option like:
-
Classwork>Create>Material
-
-
Give It a Clear Title: Name the material something your students will easily recognize, like "Lesson 1: Group Discussion Slides".
-
Attach Your PDF: Click the
UploadorAttach Filebutton and find the PDF you just saved to your computer. -
Assign to Students: Finally, click
Save,Assign, orPublish.
🚧When posting slides for the class, remember: the PDF Slides are for everyone, but the PDF Slide Notes are for your eyes only. Let's keep the surprises for the lesson!
Student Resources
Here’s a quick guide to show your students so they know exactly where to find their HealthSmart work in Google Classroom. You can share these steps directly with them!
-
Open Google Classroom: First, have your students log in and go to your Test Health Course class.
-
Click on "Classwork": At the top of the page, they should click the Classwork tab. This is where all assignments and materials are organized.
-
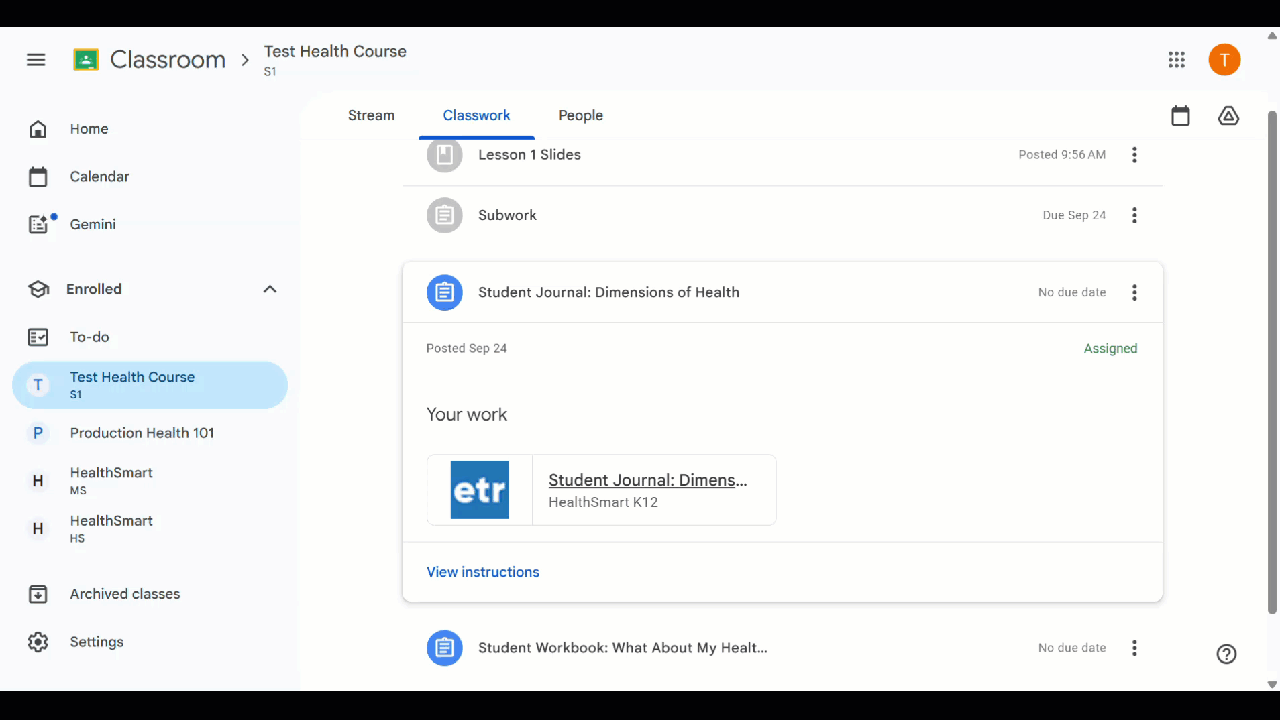
Find the Assignment: They will see a list of all posted work. For example, they might see:
-
Lesson 1 Slides (a material to view)
-
Student Journal: Dimensions of Health (an assignment to complete)
-
-
Open and Complete the Work: To start an assignment, they just need to click on its title (example, "Student Journal: Dimensions of Health"). This will open the assignment where they can:
-
Read your instructions.
-
Open any attached files or links (like the HealthSmart K12 website).
-
Complete and turn in their work.
-
💡 Heads up! Before starting, students should:
-
Allow pop-ups in the browser's address bar.
-
Look for a new login window to appear.
-
Click "Allow" when asked to grant HealthSmart access.
This quick setup gets them into their lessons seamlessly!
Re-Use Post to New Course
Do you have a great assignment, announcement, or question that you created in one Google Classroom that you'd love to use again in another? Instead of starting from scratch and re-uploading all the files and instructions, you can use the powerful "Re-use post" feature.
1. Go to Your New Classroom
Head over to the class you want to post the material in (your "destination" class). In your GIF, this is "Test Course Grade 5." Make sure you're on the Stream tab.
2. Click "Create"
In the "Share with your class" box, click the "Create" button in the bottom-right corner.
3. Choose "Re-use post"
From the menu that pops up, select "Re-use post." This will open a window showing all your classes.
4. Pick Your Original Post
-
First, select the original class where the post lives (like "Test Health Course").
-
Then, click on the specific post you want to copy (for example, the "Student Workbook: Food Log").
-
Finally, click the blue "Reuse" button!
Grading
 Ready to grade? It's simple! Just follow these steps to view, grade, and return your students' work.
1. Go to Your Classwork Tab
-
From your class homepage, click on "Classwork" at the top.
2. Find the Assignment
-
Locate the assignment you want to grade and click on its title (e.g., "Student Workbook: Food Log"). This opens the "Student work" page.
3. Review & Grade the Work
-
You'll see a list of your students. Click on a student's name (e.g., "Handed In" or "Assigned") to open their work.
-
You can add comments, corrections, or a grade directly on their document.
4. Assign a Grade & Return It
-
On the right, enter the score in the grading panel.
-
When you're finished, click the blue "Return" button. This sends their work back with the grade and any feedback!
-
⚠️ Use the "To review" section on the main Classroom page to quickly see all work that's been handed in and is ready for grading.
Teacher View of Student Drafts
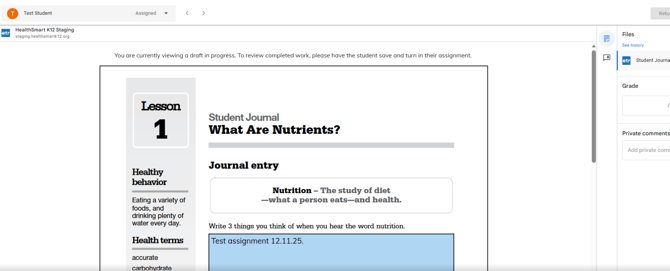
Teachers now have the ability to see a student’s work even before it’s submitted. As the student is working, teachers will see a clear message: “You are currently viewing a draft in progress. To review completed work, please have the student save and turn in their assignment.”
Unopened Assignments
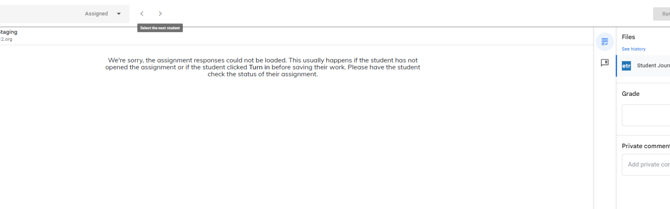
When a teacher attempts to review work, but the student hasn’t opened the assignment, they will see a helpful specific message instead of a generic error message: “We’re sorry, the assignment responses could not be loaded. This usually happens if the student has not opened the assignment or if the student clicked Turn in before saving their work. Please have the student check the status of their assignment.”
Student Submissions
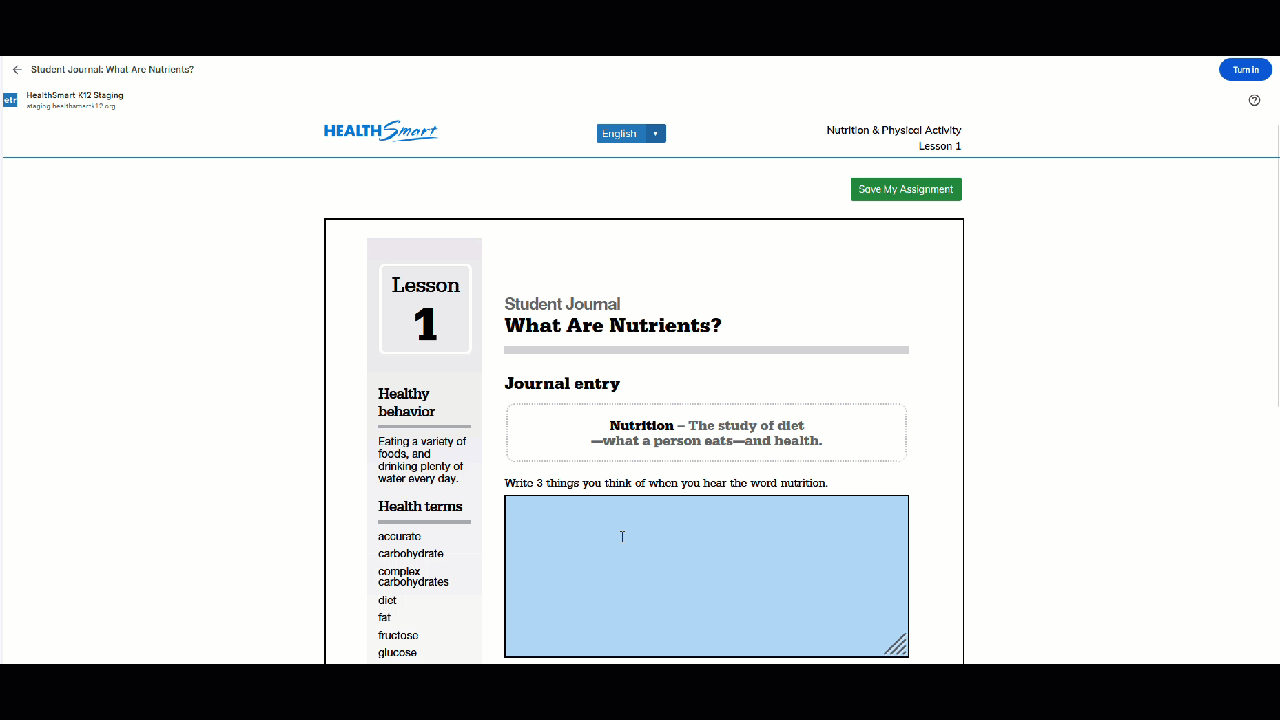
While Working: The student assignment interface is now clearer. While the assignment is in progress, the “Submit Assignment” button is changed to “Save My Assignment” and a status message of “Draft in progress” is displayed.
After Saving an Assignment: When a student saves a worksheet, the student will see a confirmation message: “Your worksheet was saved successfully. If you have additional worksheets on this assignment, return to the assignment page. Once all your work is saved, click Turn in to complete your submission.” This messaging cuts out the confusion in submitting a multi-part assignment.