The HealthSmart LTI v.1.3 integration with Canvas provides a simple way for students and teachers to access HealthSmart content from within the LMS.
In this article you can find step-by-step instructions on the following topics:
- What You Need To Get Started
- Logging In/App Install
- Starting HealthSmart
- Accessing Content
- Student Assignments
- Adding Resources
- Student View
- Content Control Settings
What You Need To Get Started
- A school/district digital subscription to HealthSmart.
- School/district IT has completed the Schoology integration setup.
Starting HealthSmart
Watch the following video to learn how to use HealthSmart with Canvas.
Logging In/App Install
HealthSmart digital integration with Canvas begins by the teacher logging in to the LMS as they would normally do. The login will appear the same way your district has configured single sign-on or SSO.

-
One-Time HealthSmart App Installation (if required by district setup):
-
Open your Canvas course.
-
Click Settings in the course navigation menu (bottom of the homepage).
-
Select the Navigation tab.
-
Locate the HealthSmart app at the bottom of the list.
-
Click and drag it into your course navigation menu.
-
Click Save to apply changes.
-
📑 Note: once the app has been installed, HealthSmart will be located in your list of digital tools under the course navigation.
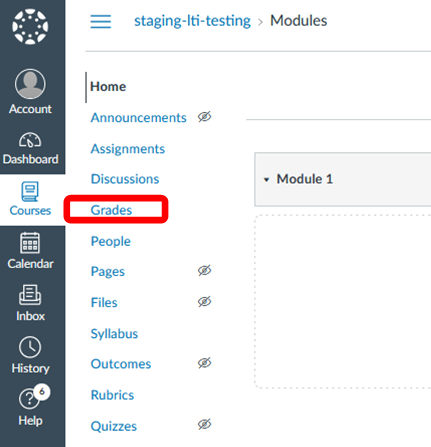
Accessing HealthSmart in Canvas

To access HealthSmart materials in Canvas, navigate to the 'HealthSmart Staging' course and select 'Modules' from the left menu. Locate the grade level (e.g. Middle School). Then select your lesson of choice, for example, 'HealthSmart MS Emotional & Mental Health Lesson 1 Dimensions of Health.' Once you've navigated to your lesson of choice, you'll find student assignments (Journal and Workbook) and downloadable lesson slides in English and Spanish.
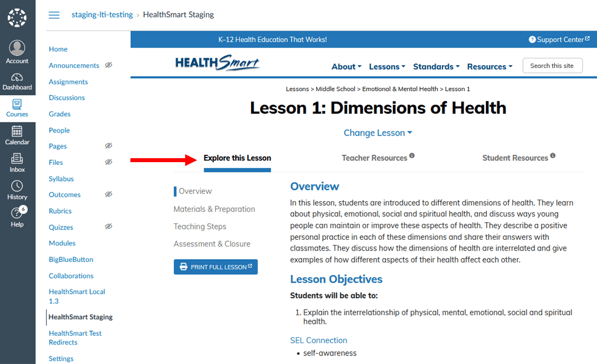
Explore this Lesson
Once the teacher selects a lesson, they can see all items related to the lesson in the Explore this Lesson tab including the overview, materials and preparation, teaching steps, and assessment. There is also a button that will allow the teacher to print out the full lesson.
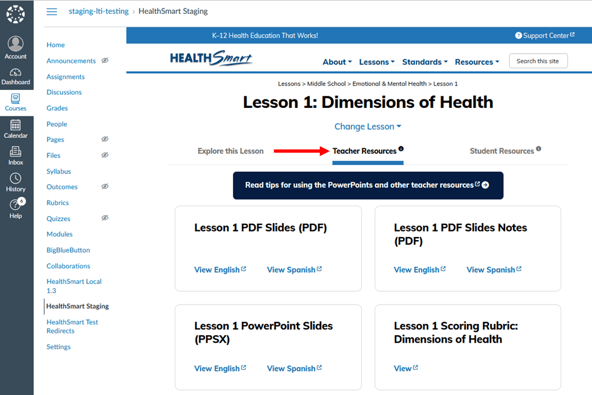
Teacher Resources
The Teacher Resources tab includes all the materials for the teacher including slides, teacher keys, masters and scoring rubrics for the lesson.
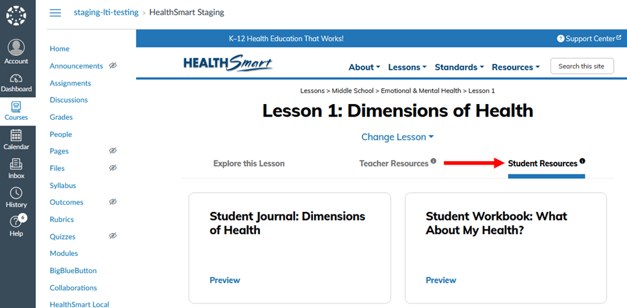
Student Resources
The Student Resources tab includes all the materials students use during the lesson, including assignments and assessments. From here, the teacher can Preview a student worksheet or download/print the resource when the Print icon is enabled.
Student Assignments
📑Note: Teachers must have a published course in order to create LMS assignments.
It is recommended that teachers create a Module in Canvas as a way to organize and save student assignments and resources. Modules, assignments, and course content can be copied to a different course for other educators to use with their students.

To assign student work, start from the Assignments page in the left-side menu within your Canvas course, then click the +Assignment button.

-
Creating Assignments
- Click the +Assignment button in the upper right-hand corner
- Scroll down to Submission Type
- Select External Tools
- Click the Find button next to the search bar
- Then click the HealthSmart hyperlink, which will launch the HealthSmart lessons
- Select your Grade, Topic, Lesson, Assignment, and Language for the assignment
- Click Add Material
- After choosing the Add Material button, click the Select button from the External Tool popup to confirm the HealthSmart assignment selection.
⚠️Important: always click the Select button in the External Tool window after creating the assignment from the list of HealthSmart lessons.

Finally, the teacher can configure the assignment setting by entering a Name, adjust the Grade settings and Due Date as needed, and add an optional note for students to read.
Configure Assignment Settings
-
Submission Type: Ensure it’s set to "External Tool."
-
Do Not Count Toward Grade: Check this box if the assignment is ungraded.
-
Assign To: Defaults to "Everyone"—change if needed.
-
Due Date: Set if required (leave blank if not applicable).
Save the Assignment
-
Click "Add Item" to finalize.
-
You’ll see a confirmation: "Your material has been saved."
Adding Resources
Teachers can choose to share additional lesson resources with students such as PDF Slides, Scoring Rubrics, and Masters found under the Teacher Resources tab of a lesson.

How to Share Teacher Resources (Like PDF Slides):
Find Your Resources:
In the menu section (to the left), click the HealthSmart Staging option
Download Your Files First
-
Open your HealthSmart lesson → Go to "Teacher Resources" tab
-
For slides: Click "View English" or "View Spanish" → "Download" (top right)
 2. Add to Canvas (2 Ways)
Option A: As an Assignment (Like in the GIF)
-
Click "Assignments" → "+ Assignment"
-
Name it (e.g., "Week 1: Nutrition Slides")
-
Under "Submission Type", choose:
-
"Online" → Check "File Uploads"
-
"Text Entry" (if adding instructions)
-
-
Attach your downloaded file (PDF/PPT)
-
Set due date/points (optional) → Click "Save & Publish"
Option B: Directly in Modules
- Go to "Modules" → Click "+" button
- Select "File Upload" → Add your slides
- Students can view/download instantly
Upload to Canvas (or Your LMS):
Add the file as an Assignment or Module Item so students can access it
📌 Pro Tips: For slides: Use PDFs (students can’t edit them). For interactive content: Choose "External Tool" → Pick HealthSmart
Uploading PowerPoint Slides to Canvas
-
Log in to Canvas and navigate to the course where you'd like to assign the PowerPoint.
-
In the Course Navigation Menu on the left, select "Assignments."
-
On the Assignments page, click the blue "+ Assignment" button in the top-right corner.
-
This will open a new page for your assignment. Here, please:
-
Give your assignment a name in the "Assignment Name" field.
-
In the rich content editor (the large text box below), locate the "Course Files" icon in the menu bar (it often looks like a folder).
-
Click the icon, select "Course Documents," and then choose the PowerPoint file you wish to upload.
-
-
When you're finished, simply click "Save & Publish" to make the assignment visible to your students.
Assignment - Additional Resources
 The resource is now published in a Module for students to access.
Grading Assignments
School districts can choose the grading method to be enabled on the HealthSmart integration with Canvas:
- Default HealthSmart grading (% scores sync to the Canvas gradebook)
- Canvas SpeedGrader (requires additional API integration)
Default HealthSmart Grading
To start grading, click on the title of an assignment.

-
Access Submissions
-
Open the assignment to view all student submissions on the grading page.
-
Filter by name, progress, or completion date, or use the search bar to find a specific student.
-
-
Review & Grade
-
Click the blue View icon next to a student’s name to grade their work.
-
Adjust the score (default is 100) and add comments if needed.
-
Click Save Grade to send the score to the LMS gradebook, or Save & Next to move to the next student.
-
📑Note: If a student's name is missing from the list, it means they have not drafted or submitted the assignment. HealthSmart is unable to display students who have not started an assignment.
Canvas SpeedGrader
To start grading, click on the title of an assignment.
SpeedGrader displays assignment submissions for active students in the course. For more information on using SpeedGrader, please see the Canvas resource: How do I use SpeedGrader.

Gradebook
To view the full list of grades assigned to HealthSmart student work, go to the Grades page found in the course navigation. From here, the teacher can manage and export all grades if entering into another gradebook system or platform.
Student View
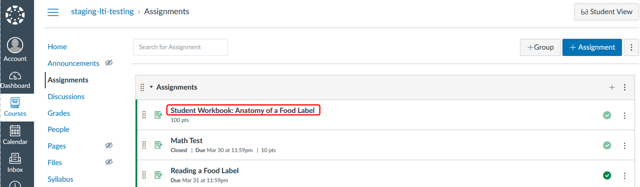
Once students have logged in to the LMS, they can go to their course, select the Assignments page from the top menu and see a list of all resources that have been assigned by the teacher
Open an Assignment
How to Complete Your Assignment:
-
Click on the assignment title in Canvas to begin.
-
Your worksheet will open in a new window—work directly in this space.
-
Don’t worry about losing progress! Your answers autosave as you go.
Need to Take a Break?
-
Close the window and return later—your draft will be saved.
-
Look for the confirmation message: “Progress saved. Not submitted.”
Language Options:
-
Use the English/Spanish toggle at the top (if your teacher enabled it).

📌Tip: Finish in one sitting or revisit anytime. Your work waits for you! 😊
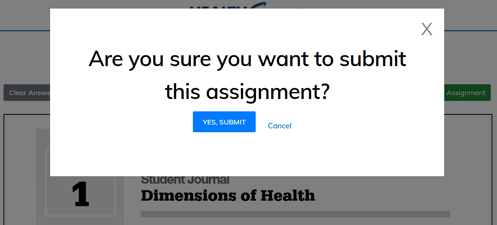
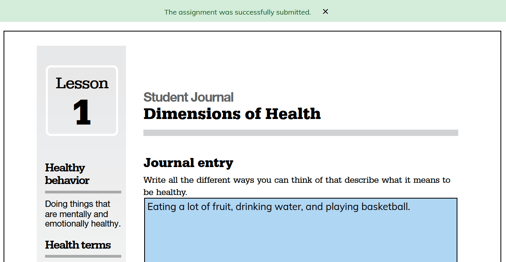
Submit an Assignment
When the student is ready, they will click the Submit Assignment button to save their work to the LMS for the teacher to grade. A pop-up window will appear to confirm the submission and the following message will appear: The assignment was successfully submitted.
If Canvas SpeedGrader is enabled, students will also see an additional popup. Select the Authorize button to confirm that the submitted assignment will be graded in SpeedGrader.
⚠️Important Note: When using SpeedGrader, students must select the Authorize button to confirm the submission. Skipping this step will not complete the submission process and may revert the assignment to a draft.

Once the assignment is submitted, the student can close out of that window.
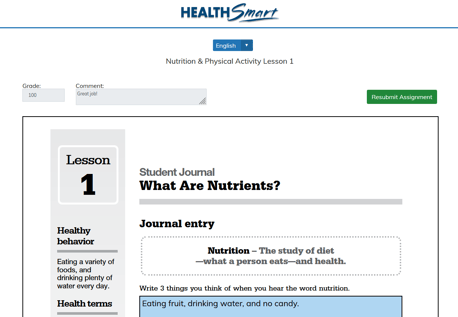
View Grade
If a student would like to resubmit or view their grade and teacher's comments on an assignment, the student can simply reopen the assignment by going to the Assignments page and clicking the title of the assignment.
Content Control Settings
HealthSmart allows school districts the autonomy for local decision-making to ensure all lessons align to state and local policies. A district administrator can be assigned content control settings to select the lessons they want educators to use while opting out of any lessons that don’t fit their scope and sequence.
To use content control settings, a district administrator can be assigned the Lesson Selector Tool which provides a toggle switch to turn on/off lesson access for all educators. See example below:

The Lesson Selector Tool is only enabled by ETR support. To request using the Lesson Selector Tool, please share the name and title of the district administrator during the HealthSmart setup call, or submit your request to support@etr.org.
📑Note: The district administrator will need teacher permissions in the LMS in order to use the Lesson Selector Tool. Teacher permissions in the LMS are handled by district IT.