Admin Guide: Configuration for Schoology
This article explains how to install and configure the HealthSmart LTI v.1.3 integration with the Schoology Learning Management System (LMS).
The following configuration guidelines are intended to be used by district IT. Please schedule a 15-minute call with us to confirm the integration setup and initiate the data sync. To schedule the setup call, please contact support@etr.org.
What You Need To Get Started
- A school/district digital subscription to HealthSmart.
- School/district IT has scheduled an integration setup call with ETR.
- Step 1: App Center
- Step 2: My Developer Apps
- Step 3: Field Values
- Step 4: App Logo
- Step 5: LTI Fields
- Step 6: Client ID and Secret Key
- Step 7: Install Access to App
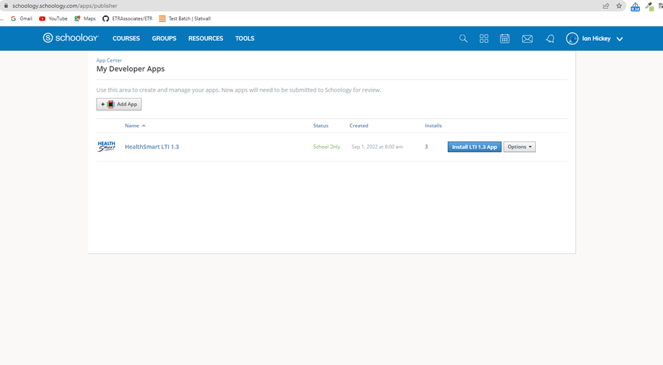
Step 1: Click App Center -> My Developer Apps or follow this link: https://schoology.schoology.com/apps/publisher
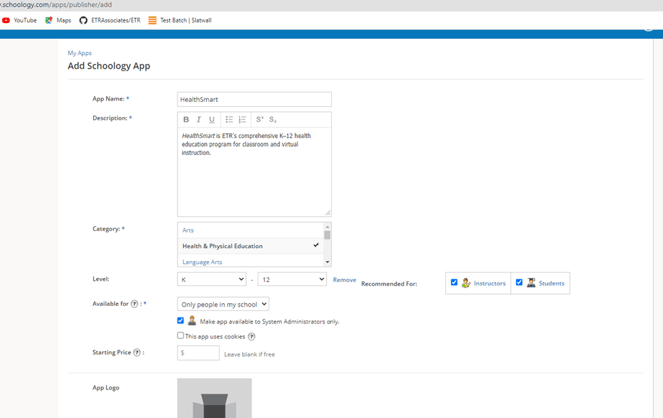
Step 3: For these settings, please use the following values:
App Name: HealthSmart
Description: HealthSmart – Where Good Health Starts. HealthSmart is ETR's skills-based K–12 health education program for classroom and virtual instruction.
Category: Health and Physical Education
Level: K (add range) 12
Recommended For: Instructors, Students
Available For: Only People in my school
☑️ This app uses cookies
Cookie Preload URL:
https://www.healthsmartk12.org/apiv1/lti/oauth/preloadcookie/
Starting Price: leave blank
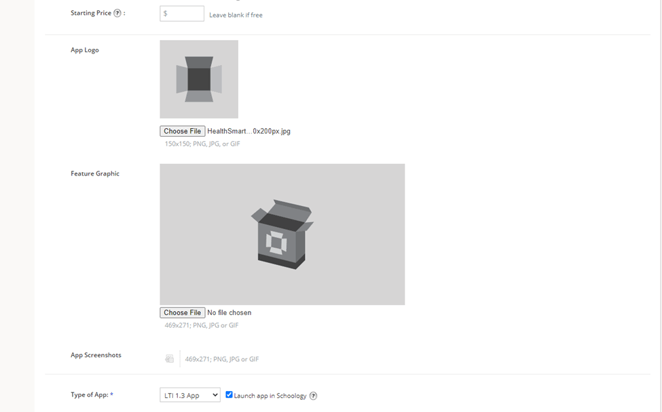
Step 4: Scroll down to the next section. For the App Logo, please download the logo file:
The other graphics fields can be left blank (for now).
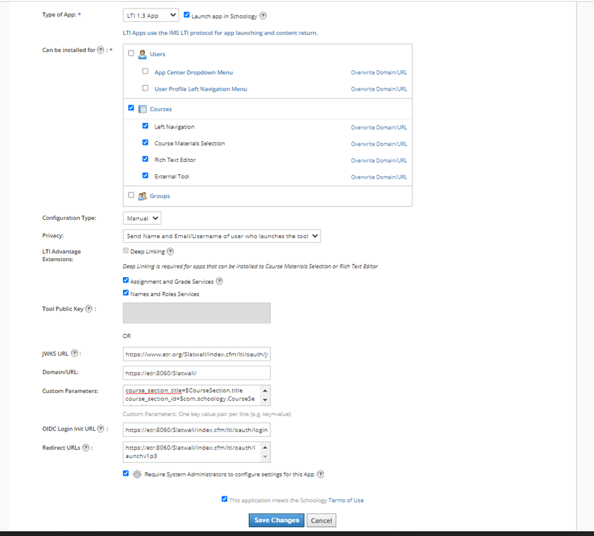
Step 5: Scroll to the final section and use the provided values.
Type of App: LTI 1.3 App
☑️ Launch app in Schoology
Can be installed for:
☑️ Courses (left navigation, course material selected, rich text editor, external tool)
Configuration Type: Manual
Privacy: Send Name and Email/Username of user who launches the tool
LTI Advantage Extensions:
☑️ Deep Linking
☑️ Assignment and grade Services
☑️ Names and Roles Services
Tool Public Key: N/A
JWKS URL: https://www.healthsmartk12.org/apiv1/lti/oauth/jwks/?keyCode=LTI1p3ETR
Domain/URL: https://www.healthsmartk12.org/
Custom Parameters (Add the following lines into the text area, one 'key=value' pair per line):
resource_assignment_title=$ResourceLink.title
resource_assignment_id=$com.schoology.Assignment.id
school_id=$com.schoology.School.id
course_section_title=$CourseSection.title
course_section_id=$com.schoology.CourseSection.id
OIDC Login Init URL: https://www.healthsmartk12.org/apiv1/lti/oauth/loginv1p3/
Redirect URLs: https://www.healthsmartk12.org/apiv1/lti/oauth/launchv1p3/
☑️ Require System Administrators to configure settings for this App (for testing)
☑️ This application meets the Schoology Terms of Use
Example image (do not use text in image):
Click the Save Changes button.
Step 6: Please make note of the Client ID and Client Secret.
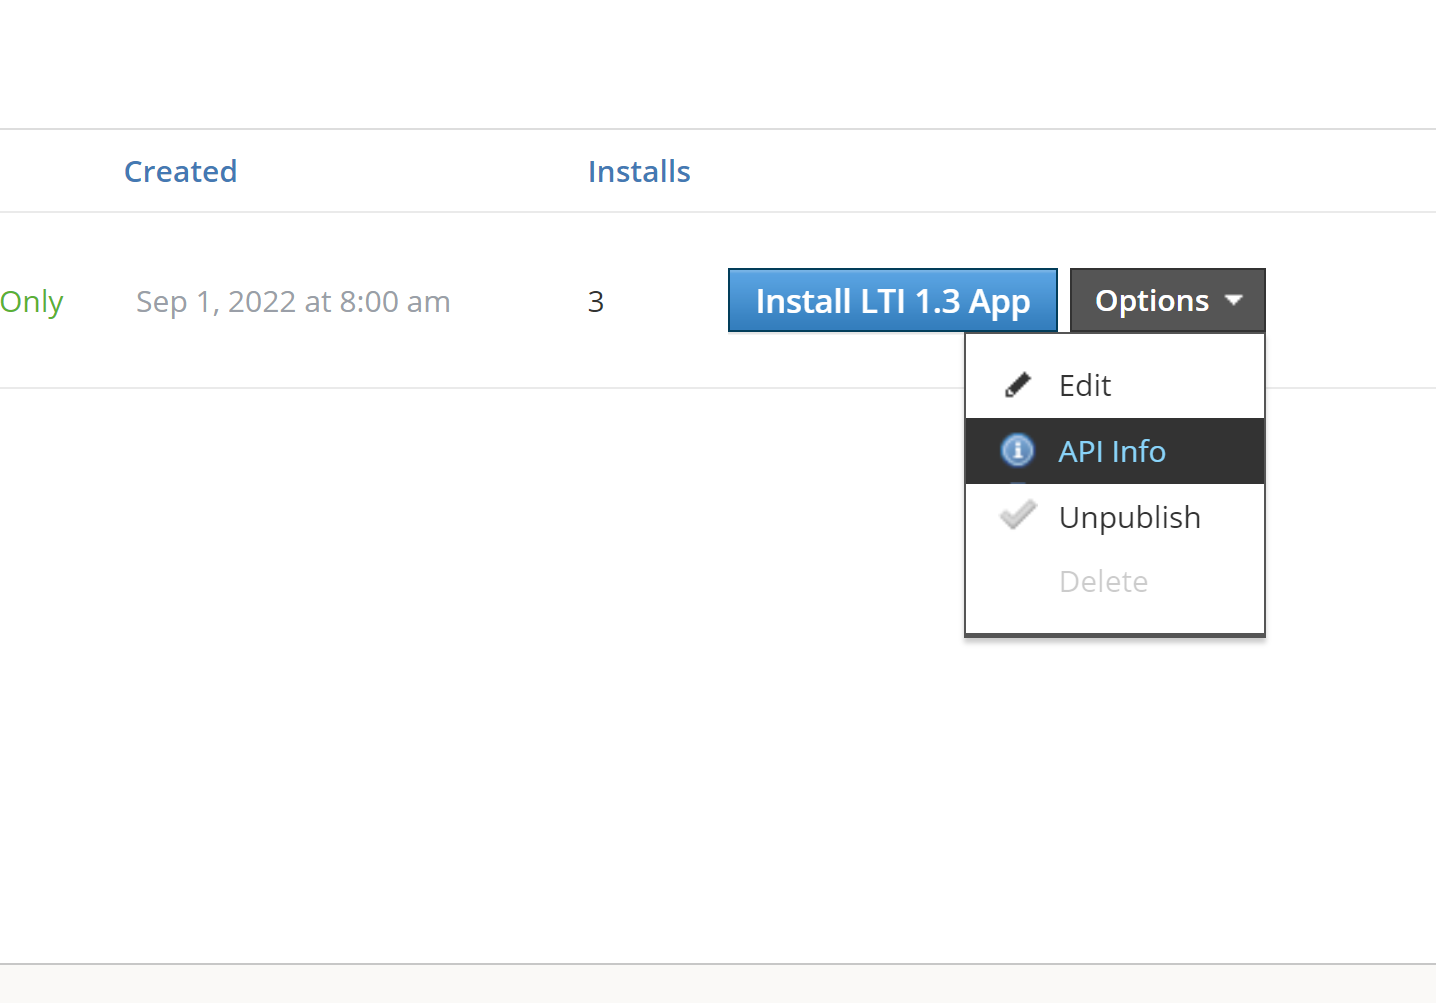
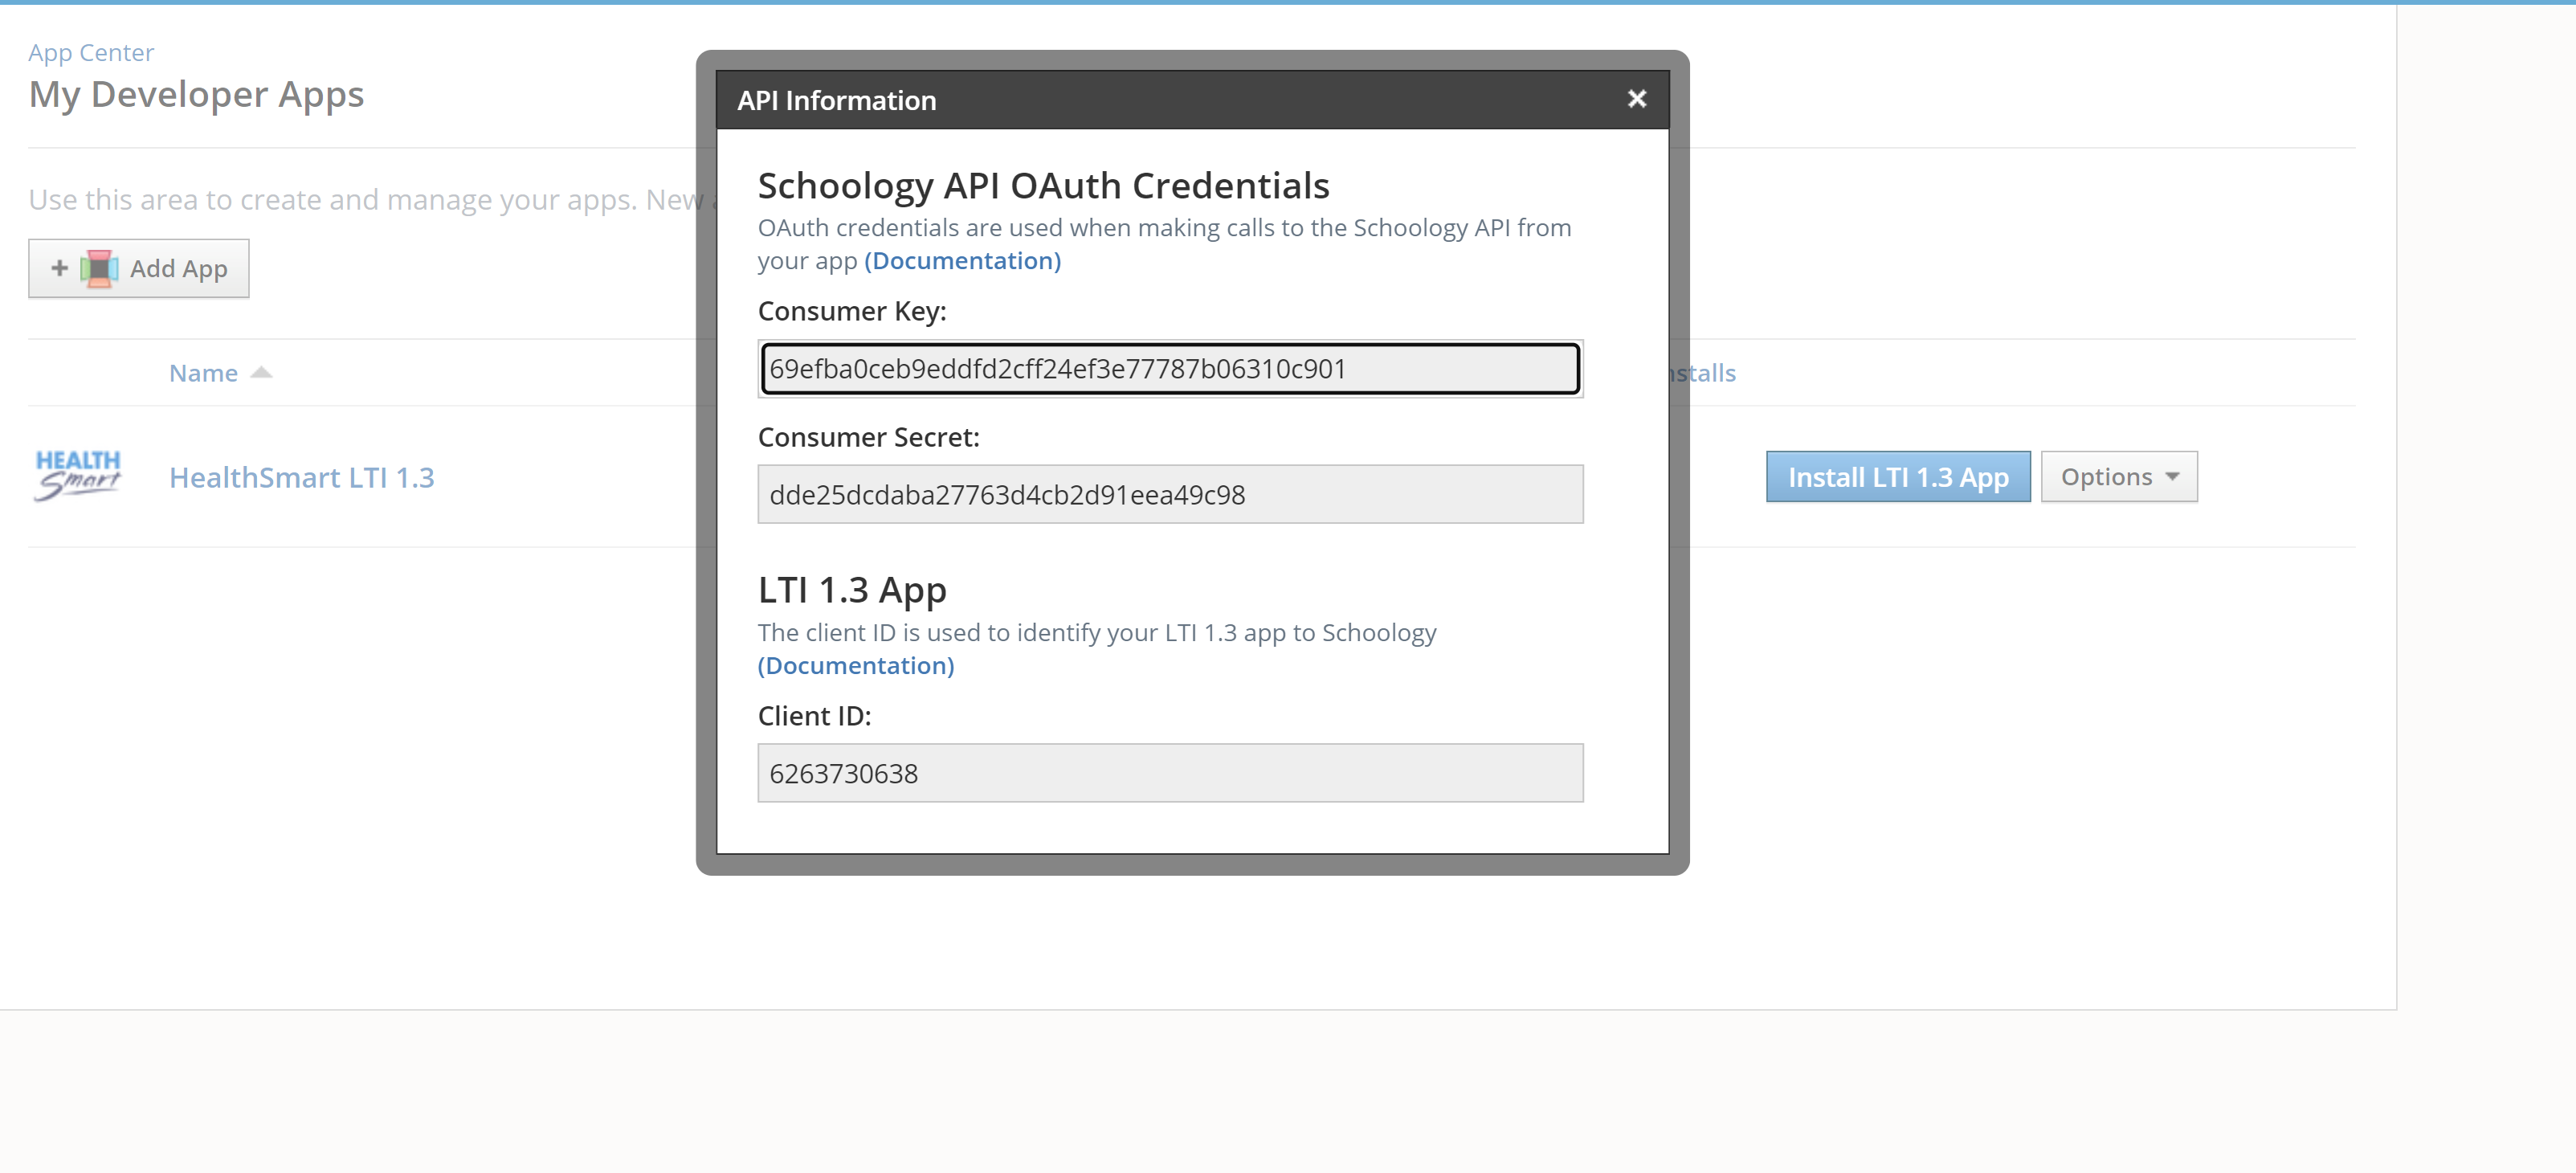
❗Important: the Consumer Key, Consumer Secret, and Client ID will need to be shared during the tech setup call with ETR. Teachers will also need the Client ID and Secret if setting up the HealthSmart app individually.
Step 7: Install the app where needed across the district (i.e. courses, buildings, etc.).
From the App Center, click on My Developer Apps. Find HealthSmart and click the Install LTI 1.3 App button.

Please select I Agree on the popup.

Please select Continue on the popup.

There are two options to install the HealthSmart app: the Organization or Individual. To make HealthSmart available to multiple educators, click Add to Organization. You should then be brought to the Organization Apps page. If you are not redirected, go back to the App Center and select Organization Apps.

From the Organization Apps page, find HealthSmart and click the Install/Remove button.


Final Confirmation: Congratulations, you’re all set! Please schedule a 15-minute call with us where you will share the ClientID and run a test to launch HealthSmart. This will verify the correct integration setup and initiate the data sync which will take 24 hours to complete. To schedule the setup call, please contact support@etr.org.
